Setting Up Gatsby Blog From Scratch
Published Last updated loading views

Welcome to Gatsby (or GatbyJS), a powerful framework for static site generation that leverages GraphQL and React. Gatsby’s popularity increases as time goes on, and more and more people are starting to use it. One of the reasons for this is its ability to help you create a simple static website straightforward and quickly.
You just whip out one of their Starter Kits, set up an account on Netlify, and boom, you have a website.
I also used to set up websites that way. I saw an opportunity to create a blog instantly without much fuss and went for it. But a problem occurred later when I tried to add some complex logic to my blog. I didn’t really understand what was going on behind the scenes. What is Gatsby doing, and why does it seem so magical? For that reason, I decided to take a step back and build a Gatsby blog from scratch.
In this post, I will share how to build a blog from a simple Gatsby starter kit and explain how Gatsby works behind the scenes. The post should bring clarity into how this opinionated framework for building static sites ticks, and how you can customize it to fit your needs.
Required Tooling
Before we begin, you will need to have a couple of things set up on your machine.
Quickly check if you have Node.js with node --version in your terminal. You should be getting NPM with Node.js, but check that quickly with npm --version . If both commands return a version, you are good to go. If not, you can follow the instructions on NPM’s website.
Now that we’ve gotten that out of the way, we can install Gatsby CLI locally. Gatsby CLI is needed to call commands that will generate our repo, start our development server, and even build our blog’s production code. To install it, you can do the following:
npm install -g gatsby-cliQuickly verify that Gatsby got installed with gatsby --version. After installing and checking everything we need to start our development, we can dive into it head first.
Initializing The Repo
To start the blog, we will use the simple hello-world start kit from Gatsby. This kit is a minimalistic one that does not give you much at first. We are doing this to understand Gatsby and its internals better. If you want to set up your website quickly, you can always opt-in for Gatsby’s other kits.
Let us create our working directory:
gatsby new my-new-blog https://github.com/gatsbyjs/gatsby-starter-hello-worldAfter Gatsby CLI finishes installing everything, we can get into our blog’s directory with cd my-new-blog and start the server using gatsby develop. This command will set up a bunch of things for us and make our website available at http://localhost:8000/.
If you open it, you can see the usual “Hello world!”. Yay! Our blog lives and breathes. But what happened just now? Yes, we ran a couple of commands in our terminal and greeted the whole world on our new blog, but how did that happen? Let us start by looking into the src/pages/index.js file:
import React from "react"

export default function Home() {
  return <div>Hello world!</div>
}
A perfectly simple React component that just says hello to the world. When we run gatsby develop, it will recognize src/pages/index.js file and treat it as logic that is for our blog’s root page. Gatsby figures this out on its own, and that is why we see the “Hello world” text when we visit the index page.
If you try to make some changes to this file, the server that is watching all the changes in our directory will update the website automatically. How neat!
Having just one file and using Gatsby sounds like overkill (and it is). That’s why we will add things to our blog and explain the process along the way.
Gatsby and GraphQL
GraphQL is a language to query your API and get data you need, with a strong emphasis on doing it one request. Being able to collect a lot of data in one request means that you don’t have to do multiple round-trips to your server and back.
Besides all of this, you need to define a schema from which you can base your queries. Gatsby smartly does this. To better understand how Gatsby and GraphQL work, let us first add some data to our website.
The first thing you probably want to add is some general information about your blog. For example, a title and description of your website are useful to anyone visiting. Let’s define this data inside the gatsby-config.js file. We will use this file later for some other endeavors, but now, let’s make it like this:
module.exports = {
  /* Your site config here */
  siteMetadata: {
    title: "My New Blog",
    description: "This is my awesome blog I made from scratch!",
  },
  plugins: [],
}
Now, let’s display this data to our users in the browser. If we go to the src/pages/index.js, we can add a simple GraphQL query to fetch the data we just added:
import React from "react"
import { graphql } from "gatsby"

export default function Home({ data }) {
  const { title, description } = data.site.siteMetadata

  return (
    <div>
      <h1>{title}</h1>
      <p>{description}</p>
    </div>
  )
}

export const pageQuery = graphql`
  query MetadataQuery {
    site {
      siteMetadata {
        title
        description
      }
    }
  }
`
At the bottom of the file, we will put the GraphQL query that will fetch the title and description we previously added to the gastby-config.js. GraphQL makes this data available, and Gatsby does the fetching. We don’t have to call the query explicitly. The fetching will be done for us in the build process.
This efficient build process is why Gatsby is defined as “disgustingly fast,” since it does all the page data fetching before the data is loaded in the browser. Of course, you can write some extra fetching logic in your components, but those were not be loaded before by default.
Gatsby will make this data available during the build process (when we run gatsby develop ) to the GraphQL by recognizing that there is some GraphQL logic inside the src/pages/index.js. Also, the siteMetadata object we added to the gatsby-config.js will be available to the GraphQL.
If you want, you can see what else is available in the GraphiQL tool here: http://localhost:8000/___graphiql. This is available to you locally when you run the server.
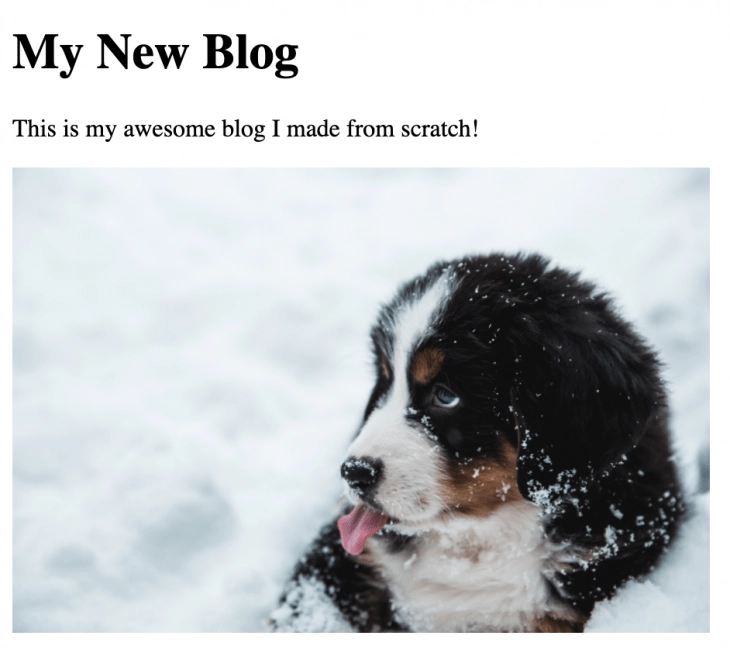
We successfully managed to pull in some data to our one-page blog, and we managed to figure out how Gatsby deals with data. But this is still not near a blog someone would read. We need to make it a bit friendly. Let’s add a picture of a cute dog and pave the way to add and read files in Gatsby.
Managing Pictures
To make our blog more engaging, we will add a picture. I will add a picture of a cute dog I found on the internet to a new directory: src/images.
The final path should look like this: src/images/cute-dog.jpg. To show this image the Gatsby way, we need to install a Gatsby plugin. Plugins are helpful libraries that make our lives easier when building Gatsby websites, and there are a lot of useful ones you can browse here. The main idea is not to write your solution for usual tasks and features like SEO, RSS, offline support, and — you guessed it — images.
The one we are going to use is called gatsby-source-filesystem. By the name of it, you can tell that it is related to files somehow. You are correct! This plugin will help us perform a query for that cute dog image using GraphQL.
To install it, run this:
npm install --save gatsby-source-filesystemThen, if you remember gatsby-config.js, we will use it to tell Gatsby that we have a plugin for it, like so:
module.exports = {
  /* Your site config here */
  siteMetadata: {
    title: "Myasd New Blog",
    description: "This is my awesome blog I made from scratch!",
  },
  plugins: [
    {
      resolve: `gatsby-source-filesystem`,
      options: {
        name: `images`,
        path: `${__dirname}/src/images/`,
      },
    },
  ],
}
Besides the data we added in the previous step, we now added the details about the gatsby-source-filesystem plugin. In the options, we specified the name of the source — “images” — and we specified the path where our images will sit.
Defining a name is an important step, and you might wonder why we need to set this. Gatsby can read data from different sources — not just our file system. Another example of a source would be WordPress or Contentful. So, our filesystem is just one possibility where we could store our images or blog posts, and setting a name to “images” could help us distinguish different sources and handle them in another manner in the future.
Anyways, after we added the plugin, if we look at the server we are running in our terminal, there should be the following message:
warn develop process needs to be restarted to apply the changes to gatsby-config.jsWe need to restart the server for the new plugin to be picked up by Gatsby. Let’s restart our server. Gatsby is known to have issues with npm install, so if you get an error when you add gatsby-source-filesystem plugin, make sure to either rm -rf node_modules && npm install or npm install react react-dom gatsby.
After the server starts, we can try to fetch the image in our src/pages/index.js file:
import React from "react"
import { graphql } from "gatsby"

export default function Home({ data }) {
  const { title, description } = data.site.siteMetadata

  return (
    <div>
      <h1>{title}</h1>
      <p>{description}</p>

      <img alt="Cute dog" src={data.image.publicURL} />
    </div>
  )
}

export const pageQuery = graphql`
  query MetadataQuery {
    site {
      siteMetadata {
        title
        description
      }
    }

    image: file(base: { eq: "cute-dog.jpg" }) {
      publicURL
    }
  }
`
We expanded our GraphQL query to search for a file with the name “cute-dog.jpg”. We then told GraphQL to alias that file to image so we can reference it meaningfully later in the code. And lastly, in our code, we put a JSX image tag and referenced the image’s public URL there.
And voilà, we got the image to show up on our page:
What we built is nice and all, but we still don’t have any blog posts on our blog, so let’s add them in the next chapter.
Handling Markdown Files
Since the age of Jekyll, it became popular to write content using Markdown, a lightweight markup language. We will do the same for our blog. Let’s add our first blog post inside src/blog/my-first-post.md:
---
title: Awesome Blog Post Title
author: Nikola
date: 2020-07-15
---

## Introduction to my blog post

Great content of my first blog
At the top is the front matter that represents general info about the post. After this comes the content. Let’s not get wild here at the beginning and use simple content that we can build on later.
Since we added the src/blog directory and we plan to store all our Markdown files there, let’s define this in our gatsby-config.js:
plugins: [
    {
      resolve: `gatsby-source-filesystem`,
      options: {
        name: `images`,
        path: `${__dirname}/src/images/`,
      },
    },
    {
      resolve: `gatsby-source-filesystem`,
      options: {
        name: `blog`,
        path: `${__dirname}/src/blog/`,
      },
    },
  ],
Now we have 2 places that Gatsby should know about: src/images and src/blog. We could go ahead and use the similar query we used for getting the image, but let’s try out a plugin Gatsby offers called gatsby-transformer-remark. This plugin allows you to use Remark, a Markdown processor, and cut down on time spent parsing all of the Markdown files.
You can install this plugin using:
npm install --save gatsby-transformer-remarkPut it inside gatsby-config.js:
plugins: [
{
resolve: `gatsby-source-filesystem`,
options: {
name: `images`,
path: `${__dirname}/src/images/`,
},
},
{
resolve: `gatsby-source-filesystem`,
options: {
name: `blog`,
path: `${__dirname}/src/blog/`,
},
},
`gatsby-transformer-remark`,
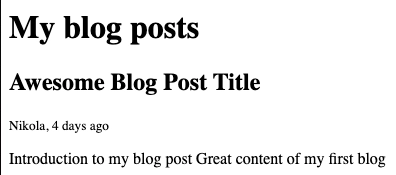
],Now we restart the gatsby develop server. Perfect! To have our blog post show up, we will build a separate page for it in src/pages/blog.js:
import React from "react"
import { graphql } from "gatsby"

export default function Blog({ data }) {
  const { posts } = data.blog

  return (
    <div>
      <h1>My blog posts</h1>

      {posts.map((post) => (
        <article key={post.id}>
          <h2>post.frontmatter.title</h2>
          <small>
            {post.frontmatter.author}, {post.frontmatter.date}
          </small>
          <p>{post.excerpt}</p>
        </article>
      ))}
    </div>
  )
}

export const pageQuery = graphql`
  query MyQuery {
    blog: allMarkdownRemark {
      posts: nodes {
        frontmatter {
          date(fromNow: true)
          title
          author
        }
        excerpt
        id
      }
    }
  }
`
Here, we are querying for all Markdown files using allMarkdownRemark, which is available from the plugin we installed gatsby-transformer-remark.
This allows us to directly fetch front matter that includes the date, title, and author. We can also pass in a parameter to date(fromNow: true), which displays relative time e.g. “5 days ago”. If it weren’t for the gatsby-transformer-remark, we would have to parse this ourselves somehow.
Then, in the blog component, we list all the blog posts with their information to the user. Notice how we don’t have links to any blog posts, but we will add this later.
Luckily, Gatsby will pick up all these changes and make a new page available at /blog. If we go to the /blog, we should see something like this:
You can add another Markdown file inside src/blog, and it will automatically get picked up by Gatsby.

Pretty cool! But how do I access a separate blog post on its own? Well, this is where things get tricky. Read on to find out how to do it.
Creating Pages Dynamically
To create links to all the blog posts, we need to tell Gatsby to create them for us. This section is where you should keep most of your attention because we now get to play with Gatsby internals. So far, we’ve installed plugins, added data, and wrote some Markdown and JSX, but now it’s time to get down and dirty.
Playing Around With Nodes
First, let’s get introduced to the term “Node” in Gatsby. As the Gatsby docs say, the “node” is the center of the Gatsby’s data system. Everything that we add in terms of data is represented as the node object in Gatsby.
If you go back and look at the query we made to fetch all Markdown posts, you can see that we query for nodes. gatsby-source-filesystem “scans” the directories we tell it to, and creates nodes for each file in those directories. Then gatsby-markdown-remark comes, parses data inside the nodes, and adds extra fields to those node objects.
Furthermore, Gatsby then concludes and comes up with a GraphQL schema for those nodes, based on their content. Wow, probably a lot of things to take in at once. I bet it will be easier if we see an example.
Let us start by creating a slug for each of our blog posts. For example, since we added src/blog/my-first-post.md, we want to see that blog post when we visit /my-first-post. To do that, we will leverage createFilePath function that comes with gatsby-source-filesystem that will do this for us.
Having just created a slug, we will also create a node we described in the section above. The best place to make a slug is the [onCreateNode](https://www.gatsbyjs.org/docs/node-apis/#onCreateNode) API that Gatsby exposes. Plugins and users like us can use onCreateNode to customize nodes or do other things when nodes get created or updated.
Logic like this is put inside gatsby-node.js, a new file which we will create:
const { createFilePath } = require(`gatsby-source-filesystem`)

exports.onCreateNode = ({ node, getNode, actions }) => {
  const { createNodeField } = actions

  if (node.internal.type === `MarkdownRemark`) {
    const slug = createFilePath({ node, getNode, basePath: `pages` })

    createNodeField({
      node,
      name: `slug`,
      value: slug,
    })
  }
}
If you go ahead and restart the server, quickly open GraphiQL tool locally: (http://localhost:8000/___graphiql) and query for slugs with this query:
{
  allMarkdownRemark {
    edges {
      node {
        fields {
          slug
        }
      }
    }
  }
}
You should see slugs of those 2 Markdown blog posts we previously added:

Pretty neat! We told Gatsby to expand each Markdown node with the field slug, which we can use to redirect users to our blog posts.
But wait, if you try to visit /another-blog-post, you will get 404. Which is fine, because we didn’t create the actual pages, we just generated slugs. Follow the next section to learn how to do this.
Programatically Spawning Pages
Lucky for us, Gatsby exposes [createPages](https://www.gatsbyjs.org/docs/node-apis/#createPages) API, which allows us to do just that. But, before we proceed with adding more logic to gatsby-node.js, we need to do something else. Since Gatsby pages use React, each page needs to have a React component that will render the data. For that purpose, we will create a component for our blog post, and put it in src/templates/blog-post.js:
import React from "react"

export default function BlogPost() {
  return <div>Hello blog post</div>
}
As you can see, it is a straightforward component that doesn’t utilize any of the data. We will change this later. We must have some kind of a React component to tell Gatsby to render our blog posts.
With that, let us add some logic to gatsby-node.js to create the actual blog post pages:
const path = require(`path`)
const { createFilePath } = require(`gatsby-source-filesystem`)

exports.onCreateNode = ({ node, getNode, actions }) => {
  const { createNodeField } = actions

  if (node.internal.type === `MarkdownRemark`) {
    const slug = createFilePath({ node, getNode, basePath: `pages` })

    createNodeField({
      node,
      name: `slug`,
      value: slug,
    })
  }
}

exports.createPages = async ({ graphql, actions }) => {
  const { createPage } = actions
  const result = await graphql(`
    query {
      allMarkdownRemark {
        edges {
          node {
            fields {
              slug
            }
          }
        }
      }
    }
  `)

  result.data.allMarkdownRemark.edges.forEach(({ node }) => {
    createPage({
      path: node.fields.slug,
      component: path.resolve(`./src/templates/blog-post.js`),
      context: {
        // Data passed to context is available
        // in page queries as GraphQL variables.
        slug: node.fields.slug,
      },
    })
  })
}
We added what seems to be a lot of code to our page creation logic. In short, this is what happens:
- We query for all Markdown pages and get their slugs
- Then, we go through all of them and call
createPage - In the
createPage, we specify the path of the page, the component we just addedsrc/templates/blog-post.js, and we pass in the context which we will explain in a jiff
If you go ahead and restart your server and try to visit http://localhost:8000/my-first-post/, you should see the simple “Hello blog post” text we added in our component before. Instead, we should see the content we put in our Markdown file.
Let’s change our src/templates/blog-post.js to be like this:
import React from "react"
import { graphql } from "gatsby"

export default function BlogPost({ data }) {
  const post = data.markdownRemark

  return (
    <div>
      <h1>{post.frontmatter.title}</h1>
      <small>{post.frontmatter.date}</small>
      <div dangerouslySetInnerHTML={{ __html: post.html }} />
    </div>
  )
}

export const query = graphql`
  query BlogQuery($slug: String!) {
    markdownRemark(fields: { slug: { eq: $slug } }) {
      html
      frontmatter {
        title
      }
    }
  }
`
Now we use the data in the Markdown files, as opposed to just showing “Hello blog post”. One thing to notice is that we use the $slug variable that we specified when creating the page in gatsby-node.js.
Slug is also available as the props inside the BlogPost component. Using the slug we defined in createPage, we then query Markdown nodes for the matching node. Then, in the component, we use the fields we specified in the query to properly show the blog post. If you open the http://localhost:8000/my-first-post/ now, you should see your blog post in full light the way you defined it in the Markdown file.
That was pretty intense, trying to create slugs and pages, and show the data inside the files. Congratulations for making it this far! As a cherry on top of the cake, let’s tie it all up by linking to those blog posts from our blog page.
Finishing Up
As you know, we created the /blog page, but we didn’t link to it from the home page. Let’s do it quickly with adding to the src/pages/index.js:
<Link to="/blog">Read my blog</Link>Then, let’s link to each blog post from our blog page:
import React from "react"
import { graphql, Link } from "gatsby"

export default function Blog({ data }) {
  const { posts } = data.blog

  return (
    <div>
      <h1>My blog posts</h1>

      {posts.map((post) => (
        <article key={post.id}>
          <Link to={post.fields.slug}>
            <h2>{post.frontmatter.title}</h2>
          </Link>
          <small>
            {post.frontmatter.author}, {post.frontmatter.date}
          </small>
          <p>{post.excerpt}</p>
        </article>
      ))}
    </div>
  )
}

export const pageQuery = graphql`
  query MyQuery {
    blog: allMarkdownRemark {
      posts: nodes {
        fields {
          slug
        }
        frontmatter {
          date(fromNow: true)
          title
          author
        }
        excerpt
        id
      }
    }
  }
`
We imported the Link component from Gatsby that will handle the routing for us. Then, we query for the slug in the GraphQL query. We later use that slug to form a link to each blog post. And that’s it! You just built a simple blog made using Gatsby from scratch.
Ideas To Try Out
The blog post we built still looks far from finished, but it should be easy going from now on. You have all the fundamentals in place to expand the blog. Here are some ideas you can try:
- Switch blog post paths to be from
/blog/*(hint: editingpathvariable when we callcreatePage) - Show all posts from the homepage
- Add some style to your blog
- Deploy it and let the world know what you have to say!
Conclusion
Kudos for making it! If you came this far, you should have learned how to build a simple blog with an understanding of the internals of Gatbsy on a high level. The concepts of nodes and how Gatsby handles data should be a breeze for you now. Also, I hope that Gatsby’s magic is a bit demystified for you.
All in all, Gatsby is a great tool to set up your static site quickly. There are many other tools and ways to go about it, but understanding the essence and what is going on behind the curtains is always a step in the right direction. I hope this knowledge sticks with you in the future and helps you build great websites.
If you liked the post, consider sharing it with your friends and coworkers.
Until next time, cheers!
This article was originally posted on LogRocket
Tagged as: JavaScriptGatsby
Join the newsletter!
Subscribe to get latest content by email and to become a fellow pineapple 🍍